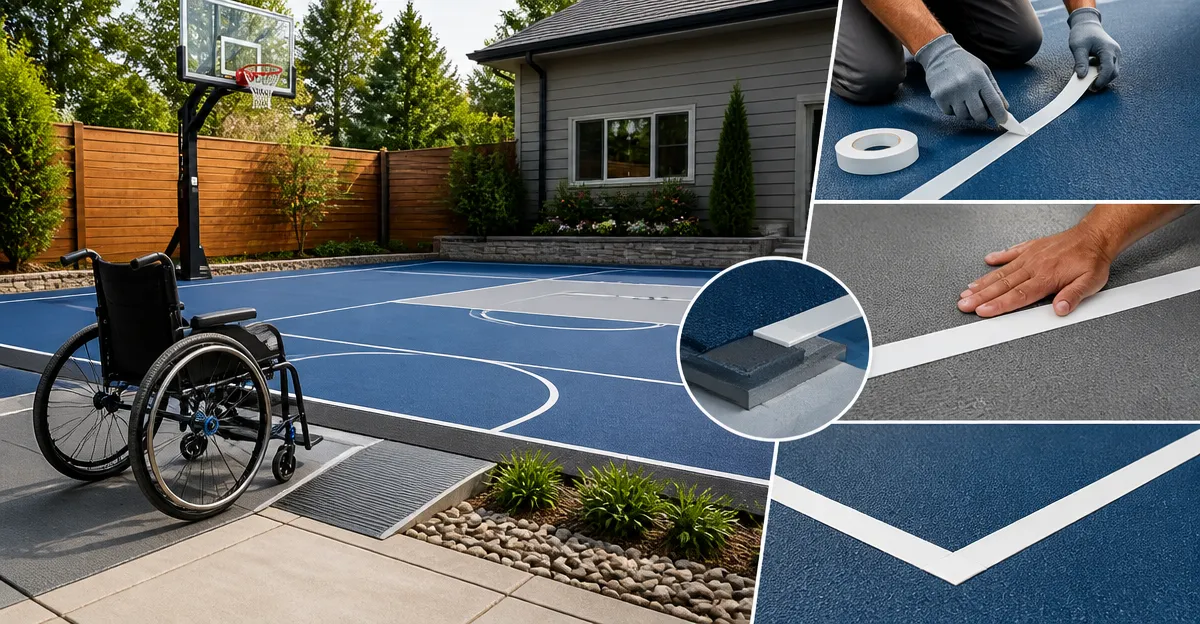
How to Choose and Install the Best Low-Profile Backyard Court Markings for Accessibility
Introduction
Creating a safe and accessible backyard court requires thoughtful planning, appropriate materials, and precise installation. This guide will teach the reader how to select low‑profile markings that meet accessibility standards while preserving the aesthetic of the outdoor space. The reader will learn how to measure the playing area, prepare the surface, choose the optimal tape, and install the markings with professional quality. By following these steps, one can transform a simple lawn or patio into a functional court that welcomes players of all abilities.
What You Will Need
- Measuring tape or laser distance meter
- Chalk line or temporary marker
- Cleaning supplies (broom, mild detergent, water)
- Low‑profile floor marking tape (see product recommendations)
- Utility knife or scissors
- Rubber mallet or roller for adhesion
- Protective gloves
All recommended tapes are available on Amazon and include detailed specifications that support indoor and outdoor use.
Step 1: Assess the Space and Define Court Dimensions
The first major step is to assess the available backyard area and confirm that it can accommodate the desired sport. Measure the length and width with a reliable measuring tape, and compare the results to the official dimensions for the chosen activity, such as pickleball (20 ft × 44 ft) or a multi‑purpose play zone. Mark the outer perimeter with a chalk line to visualise the boundaries before committing to permanent markings. This preparatory work prevents costly errors and ensures that the final layout complies with accessibility guidelines, including clear pathways for wheelchair users.
Step 2: Prepare the Surface for Optimal Adhesion
Surface preparation is critical for low‑profile tape to adhere without lifting during play. Sweep the area thoroughly to remove debris, then wash the surface with a mild detergent solution to eliminate dust and oils. Rinse with clean water and allow the surface to dry completely; a dry substrate reduces the risk of residue and enhances the tape's grip. For concrete or asphalt, a light sanding may be required to create a slightly rough texture that improves adhesion.
Step 3: Choose the Appropriate Low‑Profile Tape
When selecting a tape, consider durability, residue‑free removal, and colour contrast for visibility. Three products meet these criteria and are suitable for backyard courts:
- Champion Vinyl Floor Marking Tape – a 2‑inch wide, 60‑yard roll priced at $11.39 with a 4.5‑star rating from 4,086 reviews. Its extra‑durable adhesive adheres to most hard surfaces and promises no floor scuffing or residue, making it ideal for mixed‑use areas such as patios and gym‑style decks.
- Quick Court Pickleball Tape – a 2‑inch wide, 230‑foot roll priced at $?? (price not provided) with a 4.4‑star rating from 144 reviews. This tape is formulated for indoor gym floors but performs well on smooth outdoor surfaces such as sealed concrete, offering a strong hold during play and clean removal without residue.
- AEXHOT Pickleball Court Tape – a 2‑inch wide, 328‑foot roll priced at $23.74 with a 0‑star rating (rating not provided). The tape is anti‑slip, wear‑resistant, and waterproof, making it suitable for outdoor courts exposed to moisture.
For a low‑profile backyard installation, the Champion tape offers the best balance of cost, durability, and residue‑free removal, while the AEXHOT tape provides added weather resistance for exposed locations. The Quick Court tape can be used when a longer continuous length is required, such as for a full‑size pickleball court without seams.
Step 4: Layout the Markings Using the Tape
Begin by aligning the tape with the chalk‑line perimeter. Unroll a small section of tape, press the leading edge onto the surface, and use a rubber mallet or roller to smooth it firmly. For straight lines, a straight‑edge or laser level ensures perfect alignment. When the tape must curve around a corner, gently bend it while maintaining contact with the surface; the Champion tape is designed to conform to curves without losing adhesion. Continue unrolling until the entire boundary is marked, then trim excess with a utility knife.
Step 5: Add Service Lines and Accessibility Markings
After the outer boundary, add interior service lines such as the non‑volley zone (kitchen) and baseline. Measure each line precisely, using the same tape to maintain colour consistency. For accessibility, include a contrasting 4‑inch wide pathway along one side of the court to accommodate wheelchair users. The AEXHOT tape’s bright orange colour provides high visibility for such pathways, while the Champion tape’s white colour offers a subtle aesthetic for standard lines.
Step 6: Secure the Tape and Perform a Final Inspection
Once all lines are placed, run a roller over the entire surface to ensure uniform pressure and adhesion. Inspect each seam for gaps; if any are detected, press the edges together and apply additional pressure. Verify that the markings are level, straight, and free of bubbles. Finally, test the surface by walking or rolling a wheelchair across the court to confirm that the tape does not lift under weight.
Tips & Pro Tips
- Apply tape in moderate temperature conditions (50‑80 °F) to achieve optimal adhesive performance.
- For uneven surfaces, use a thin layer of adhesive primer before applying the tape to improve bonding.
- Store any unused tape in a cool, dry place to prevent the adhesive from drying out.
- When cutting tape, use a sharp utility knife and a straight edge to achieve clean edges that do not peel.
- Consider adding reflective tape strips for evening play; they do not interfere with the primary markings.
Troubleshooting
Issue: Tape lifts after a few games.
Solution: Ensure the surface was completely clean and dry before installation. Re‑adhere the lifted section with a roller, and consider applying a thin coat of acrylic floor sealant to the area.
Issue: Residue remains after removal.
Solution: Use a residue remover specifically designed for adhesive tapes, or apply warm soapy water and a soft cloth to gently lift the remaining particles.
Conclusion
By following the steps outlined in this guide, one can create a low‑profile backyard court that meets accessibility standards and provides durable, professional‑grade markings. The careful selection of tape, thorough surface preparation, and precise installation are the pillars of a successful project. Readers are encouraged to apply these practices to any outdoor recreational space, thereby enhancing both safety and enjoyment for all participants.
Products Mentioned in This Guide
Frequently Asked Questions
What defines a low-profile backyard court marking?
Low-profile markings are thin, flush‑lying tapes or paints that provide clear lines without creating trip hazards.
How do I ensure the markings meet accessibility standards?
Use tape at least 2 inches wide, high‑contrast colors, slip‑resistant backing, and follow ADA‑recommended spacing.
Which type of tape is best for outdoor use and durability?
Choose UV‑resistant, weather‑proof low-profile floor marking tape with a strong adhesive for concrete, asphalt, or grass.
What is the proper method to install the tape to prevent peeling?
Clean the surface, apply the tape, then press firmly with a rubber mallet or roller for about 30 seconds.
How often should I maintain or replace the court markings?
Inspect every 6–12 months and replace any sections that are faded, worn, or lifting to keep the court safe and visible.