How to Install DIY Portable Pickleball Court Lines on a Driveway: Materials, Layout & Step‑by‑Step Guide
Introduction
One can transform a typical residential driveway into a functional pickleball court with minimal expense and effort. This guide explains the entire process, from measuring the space to applying durable court lines and setting up a portable net. Readers will discover why temporary markings are advantageous for seasonal play and how professional‑grade tools simplify each task. By following the instructions, one will achieve a regulation‑size playing surface that can be removed without residue when the season ends.
What You’ll Need
- Professor Pickleball Court Tape – 200 ft of 2‑inch yellow tape, $17.99, 4.2‑star rating (31 reviews).
- FunBy Portable Pickleball Net Set – 10 ft × 2.6 ft net with paddles and weight bags, $49.98, 4.1‑star rating (22 reviews).
- SportzPals Pickleball Court Marker Kit – Nylon boundary lines with sandbags, $74.99, 4‑star rating (28 reviews).
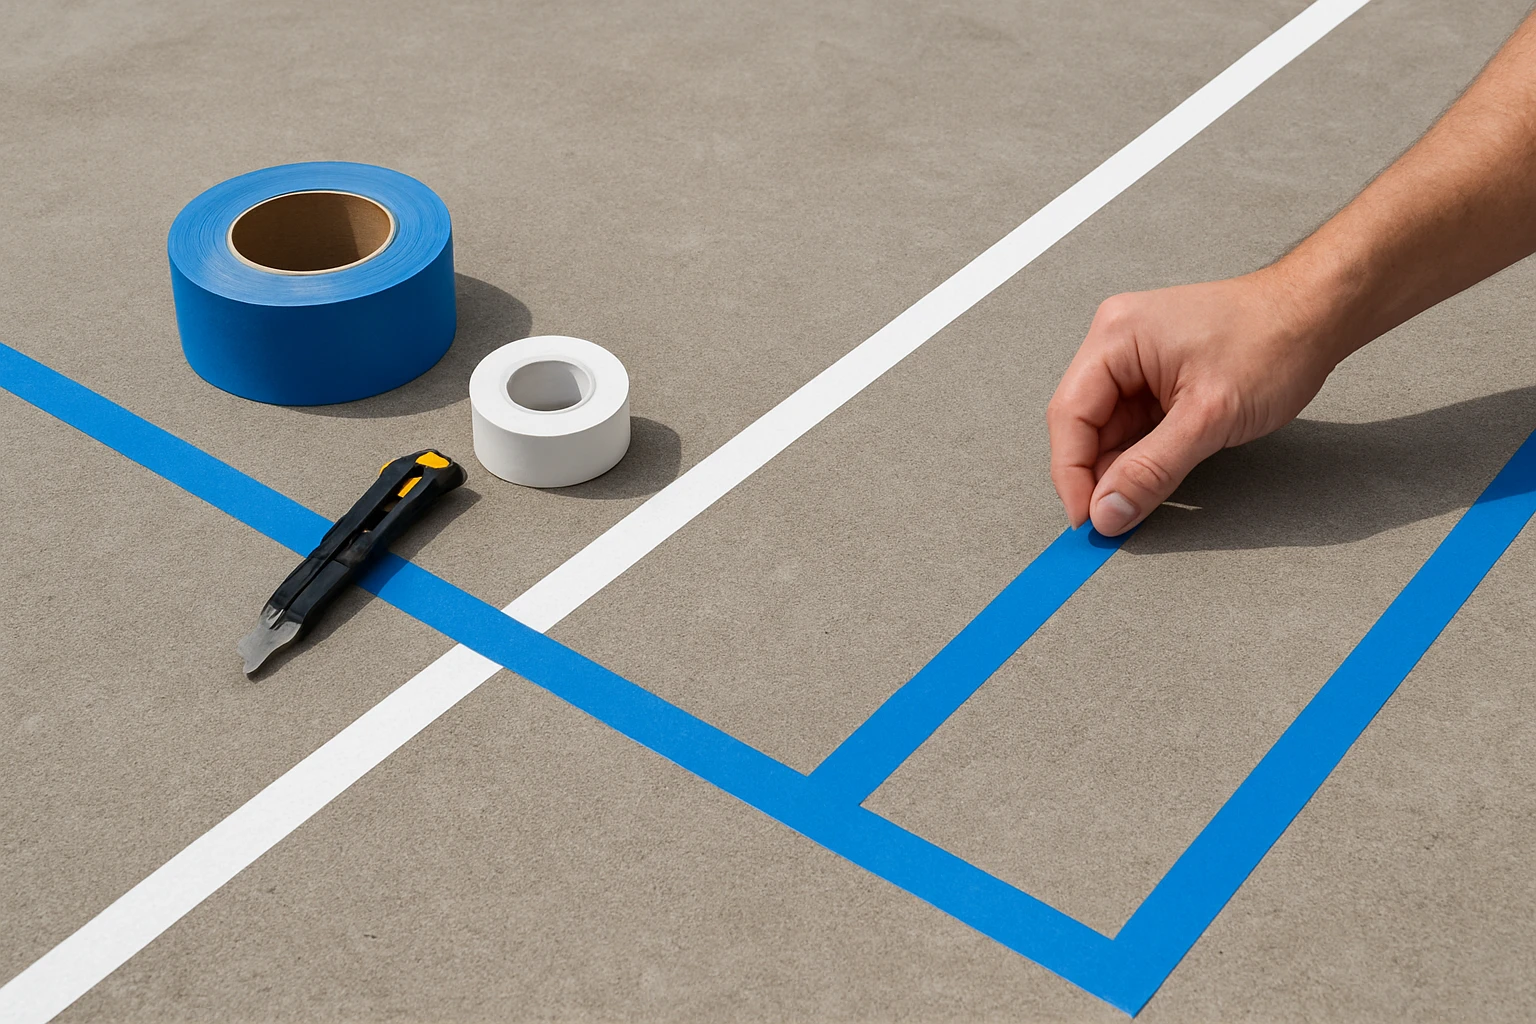
- Measuring tape (minimum 25 ft), chalk line, utility knife, level, rubber mallet, and a small shovel for sandbag placement.
Step‑by‑Step Instructions
Step 1 – Measure the Available Space and Determine Layout
The official pickleball court measures 44 ft long and 20 ft wide, with a 14‑ft non‑volley zone (the "kitchen") extending 7 ft from each baseline. Use a measuring tape to confirm that the driveway can accommodate these dimensions plus a minimum of 2 ft of clearance on all sides for player safety. Mark the outer rectangle with a chalk line; this temporary guide will help align the tape or nylon lines later. If the driveway is narrower, consider a reduced‑size layout but maintain the correct proportion of the kitchen and service areas.
Step 2 – Prepare the Surface
Clean the driveway thoroughly to remove debris, oil spots, and loose gravel. A pressure washer or a stiff broom followed by a mild detergent will ensure optimal adhesion for any marking material. Allow the surface to dry completely; moisture can cause tape to lift or sandbags to shift during play. For concrete or asphalt, a level check with a carpenter’s level will reveal any high spots that could affect ball bounce.
Step 3 – Install Permanent‑Feel Temporary Lines Using Court Tape
Unroll the Professor Pickleball Court Tape and align the first strip with the baseline of the chalk‑drawn rectangle. The tape is 2 inches wide, providing a clear visual cue while remaining easy to handle. Press the tape firmly from one end to the other, using a rubber mallet to eliminate air bubbles and ensure full contact with the surface. Continue this process for the sidelines, service lines, and the kitchen line, cutting excess with a utility knife. The tape’s weather‑resistant adhesive prevents premature lifting, and its residue‑free removal means the driveway will return to its original condition after the season.
Step 4 – Alternative Boundary Marking with Nylon Lines
If a more professional appearance is desired, the SportzPals Pickleball Court Marker Kit offers UV‑resistant nylon lines that are visible in bright sunlight. Each line measures the exact court dimensions (44 ft × 20 ft) and includes Velcro‑fastened sandbags for anchoring on uneven surfaces. Lay the nylon lines over the chalk rectangle, secure each end with a sandbag, and tension the line using the provided tape or a small rope. The orange color enhances visibility, and the T‑shaped middle design reduces tripping hazards for players.
Step 5 – Set Up the Portable Net System
After the court lines are in place, assemble the net using the FunBy Portable Pickleball Net Set. Connect the steel tubes by inserting the spring‑loaded rope, then expand the frame to a 10 ft width, which aligns with the standard net width. Fill the two side weight bags with water or sand; this added mass prevents the net from wobbling during fast rallies. Attach the net to the frame using the built‑in hooks, ensuring a taut surface without sag. The set includes two wooden paddles and eight pickleballs, allowing immediate gameplay without additional purchases.
Step 6 – Final Adjustments and Safety Checks
Walk the perimeter of the newly marked court to verify that all lines are straight and that the net is centered. Use a level to confirm that the net height is 36 inches at the sidelines and 34 inches at the center, as required by official rules. Remove any chalk residue that may obscure line visibility, and double‑check that sandbags are securely fastened. Finally, perform a short practice rally to ensure that the surface provides consistent bounce and that the net remains stable under typical play conditions.
Tips & Pro Tips
- Apply the tape in moderate temperature (50‑80 °F) to achieve optimal adhesion; extreme cold can cause the adhesive to become brittle.
- When using the nylon lines, tighten them just enough to avoid slack but not so much that the material stretches permanently.
- Consider adding a thin layer of outdoor paint over the tape for enhanced durability during rainy periods; the paint can be removed with a standard solvent after the season.
- Store the net set in its carry bag and keep the weight bags empty when not in use to prolong the lifespan of the fabric and seams.
Troubleshooting
| Problem | Possible Cause | Solution |
|---|---|---|
| Tape lifting at edges | Surface not fully dry or dust present | Clean the area again, allow it to dry, and re‑apply tape with firm pressure. |
| Net swaying in wind | Insufficient weight in side bags | Fill bags with sand instead of water for greater mass, or add extra sandbags. |
| Nylon lines slipping | Sandbags not secured tightly | Adjust Velcro straps and ensure sandbags sit on level ground. |
Conclusion
By following this guide, one can create a regulation‑size pickleball court on a driveway using temporary yet durable marking solutions. The combination of Professor Pickleball Court Tape, the FunBy Portable Pickleball Net Set, and the SportzPals Pickleball Court Marker Kit provides a flexible, cost‑effective solution for seasonal play. The court can be removed without damaging the driveway, allowing the space to revert to its original use. One is encouraged to enjoy regular practice and friendly matches, confident that the setup will endure throughout the playing season.
Products Mentioned in This Guide
Frequently Asked Questions
What size driveway space is needed for a regulation pickleball court?
A standard court requires 20 ft × 44 ft of clear playing area, plus a few extra feet on each side for safety.
Which tape is recommended for durable portable court lines?
Professor Pickleball Court Tape, a 2‑inch yellow, 200‑ft roll, provides weather‑resistant markings that peel off cleanly.
How do I lay out the court lines on an uneven driveway?
First clean and level the surface, then use a chalk line or laser guide to snap straight reference lines before applying the tape.
Can the portable net be set up and taken down easily?
Yes, the FunBy Portable Pickleball Net Set folds and secures with weighted bags, allowing quick assembly and removal.
Will the tape leave residue after removal?
The tape is designed for temporary use and typically peels off without leaving adhesive residue on concrete or asphalt.