How to Winterize Your Permanent Backyard Pickleball Court: Step‑by‑Step Guide to Protecting Surface, Nets & Equipment
Introduction
Winter weather can degrade a permanent backyard pickleball court faster than many owners anticipate. Moisture infiltrates the surface, freeze‑thaw cycles cause cracks, and exposed nets become brittle. This guide explains how to safeguard the playing surface, secure the nets, and store equipment so that the court remains ready for spring play. By following these procedures, one can extend the lifespan of the court, avoid costly repairs, and maintain a professional appearance throughout the cold months.
Readers will learn a systematic approach that combines proper cleaning, protective coverings, and strategic storage. The instructions are designed for intermediate DIY enthusiasts who possess basic tools and are comfortable performing moderate maintenance tasks. Although product recommendations are included, the methods remain effective without any purchase.
Each step includes a rationale, actionable instructions, and optional tools that enhance efficiency. The guide concludes with practical tips, troubleshooting advice, and a concise recap to reinforce the key points.
What You'll Need
- Soft‑bristle broom or push broom
- Garden hose with spray nozzle
- pH‑balanced surface cleaner
- Protective tarp or court cover (sized for your dimensions)
- Sturdy zippered paddle storage sleeves – MYKUJA Pickleball Paddle Covers (4‑Pack) or AEXHOT Pickleball Paddle Covers (2‑Pack)
- Weather‑resistant zip ties or cord
- Rubber mallet
- Silicone‑based sealant (optional for cracks)
Step 1: Thoroughly Clean the Playing Surface
The first priority is to remove debris, organic matter, and any lingering moisture that could freeze into the surface. Sweep the entire court with a soft‑bristle broom to collect leaves, twigs, and dust. Follow the sweep with a gentle spray from a garden hose, using a low‑pressure nozzle to avoid dislodging the surface coating.
Apply a pH‑balanced surface cleaner according to the manufacturer’s directions. Allow the solution to sit for five minutes; this loosens stubborn grime without etching the acrylic or concrete layers. Rinse thoroughly and let the surface dry completely, preferably on a sunny day.
Why cleaning matters: contaminants act as abrasives during freeze‑thaw cycles, accelerating surface wear. A clean surface also improves the adhesion of any sealant applied later.
Step 2: Inspect and Repair Surface Cracks
After the surface dries, walk the court and visually inspect for hairline cracks or gaps. Use a rubber mallet to tap any loose sections, confirming they are firmly attached. For cracks wider than ¼ inch, clean the fissure with a wire brush, then fill it with a silicone‑based sealant designed for outdoor courts.
Apply the sealant with a caulking gun, smoothing it with a putty knife to achieve a level finish. Allow the sealant to cure for at least 24 hours before proceeding to the next step. This preventative measure stops water from seeping into the substrate, where it could expand and worsen the crack during freezing temperatures.
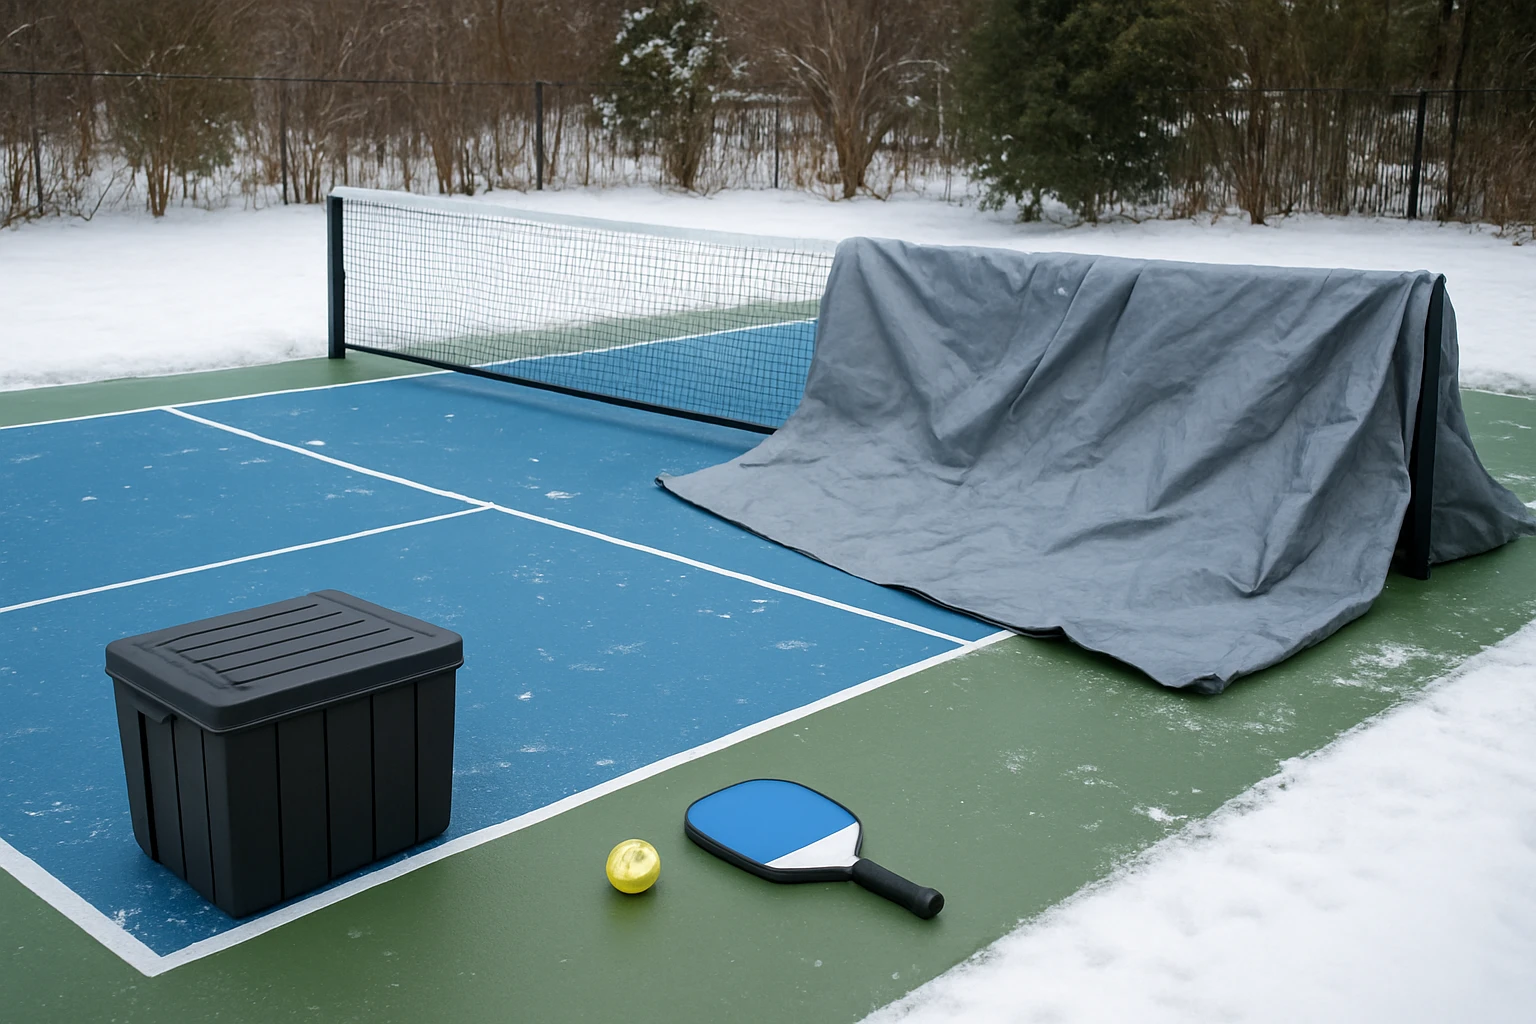
Step 3: Cover the Court with a Weather‑Resistant Tarp
Choosing the right tarp is essential for protecting the surface from snow, ice, and UV degradation. A heavy‑duty polyethylene tarp with reinforced grommets provides durability and easy anchoring. Lay the tarp over the entire playing area, ensuring a few extra inches extend beyond the perimeter to prevent water pooling at the edges.
Secure the tarp using weather‑resistant zip ties or sturdy cord, fastening them to the existing court anchor points or to ground stakes placed at the corners. Tension the tarp slightly; a taut cover sheds snow and reduces the risk of water accumulation that could seep beneath the material.
Why a tarp is preferred over a simple blanket: a high‑quality tarp offers waterproof protection while allowing limited airflow, preventing mold growth beneath the cover.
Step 4: Protect the Net System
The net, its posts, and the tensioning cables are vulnerable to brittleness when exposed to cold, dry air. Begin by loosening the net tension slightly to relieve stress on the cords. Then, drape a lightweight, breathable net cover—such as a nylon mesh sleeve—over the entire net assembly.
Fasten the cover with zip ties at each post, ensuring it does not trap moisture against the metal. For added protection, apply a thin coat of rust‑inhibiting spray to the metal components before covering them. This step reduces corrosion risk and maintains the net’s structural integrity throughout winter.
Step 5: Store Paddles and Small Equipment Properly
Paddles are the most frequently handled pieces of equipment, and they require individual protection from moisture and impact. Place each paddle inside a zippered neoprene sleeve. The MYKUJA Pickleball Paddle Covers provide a 4‑pack in assorted colors, each measuring approximately 8.6 × 11.6 inches, which fits most standard paddles. They are constructed from scuba‑fabric, offering waterproof, scratch‑resistant protection, and the zipper design ensures easy access.
Each sleeve costs $20.99, carries a 4.6‑star rating from 47 reviews, and is praised for its durability and lightweight feel. For households with fewer paddles, the AEXHOT Pickleball Paddle Covers provide a 2‑pack at $12.99, also rated 4.6 stars from 151 reviews. Their neoprene construction is similarly waterproof and resistant to dirt, making them ideal for storage in a garage or shed.
Place the covered paddles in a dry, temperature‑controlled area, such as a basement or interior closet. Avoid storing them directly against exterior walls where condensation may occur.
Step 6: Secure Miscellaneous Accessories
Other items such as scoreboards, ball containers, and portable benches should also be protected. Wrap them in plastic sheeting or store them inside a weather‑proof storage box. If space permits, keep spare balls in a sealed zip‑lock bag to prevent moisture absorption.
Label each container clearly to simplify retrieval when the season changes. This organizational habit reduces the time required to set up the court in spring.
Tips & Pro Tips
- Perform the winterization process after the first hard freeze, when the ground is fully frozen, to avoid re‑wetting the surface.
- Use a moisture meter to verify that the surface is completely dry before covering it.
- Inspect the tarp periodically throughout winter; remove snow buildup to prevent excess weight that could tear the material.
- Apply a thin layer of silicone sealant to the net post bases annually, even if no cracks are visible, as a preventative measure.
- When using the paddle covers, ensure the zipper is fully closed to maintain the waterproof seal.
Troubleshooting
Problem: Water pools under the tarp and freezes.
Solution: Re‑tension the tarp to create a slight slope toward the edges, allowing meltwater to escape. If the tarp material is sagging, replace it with a heavier‑gauge version.
Problem: Net posts become rusted despite covering.
Solution: Remove the net cover, clean the posts with a wire brush, apply rust‑inhibiting spray, and reinstall the cover. Consider using galvanized or stainless‑steel posts for future installations.
Conclusion
Winterizing a permanent backyard pickleball court requires diligent cleaning, targeted repairs, and the use of protective coverings for both the surface and equipment. By following the six steps outlined above, one can mitigate the damaging effects of cold weather, preserve the net system, and keep paddles in optimal condition. The recommended paddle sleeves—MYKUJA and AEXHOT—offer reliable, waterproof storage solutions that complement the overall winterization strategy. When spring arrives, the court will be ready for immediate play, saving time and expense on repairs.
Products Mentioned in This Guide
Frequently Asked Questions
What is the first step in preparing a permanent backyard pickleball court for winter?
Begin by thoroughly cleaning the surface to remove debris, dirt, and any standing water that could freeze and cause damage.
How can I protect the court surface from freeze‑thaw cracks?
Apply a breathable, weather‑resistant cover or tarp that allows moisture to escape while shielding the surface from snow and ice.
What is the best way to store and protect the nets during cold months?
Remove the nets, clean them, and store them in a dry indoor space or a sealed container to prevent brittleness and UV damage.
Should I use any special chemicals or sealants before winter?
A thin coat of a UV‑stable, water‑repellent sealant can be applied after cleaning to reduce moisture penetration, but it’s optional.
How do I maintain equipment like paddles and balls over winter?
Keep paddles in a temperature‑controlled area and store balls in airtight bags to avoid moisture absorption and cracking.